ALICE Portal Global Custom Fields Tab
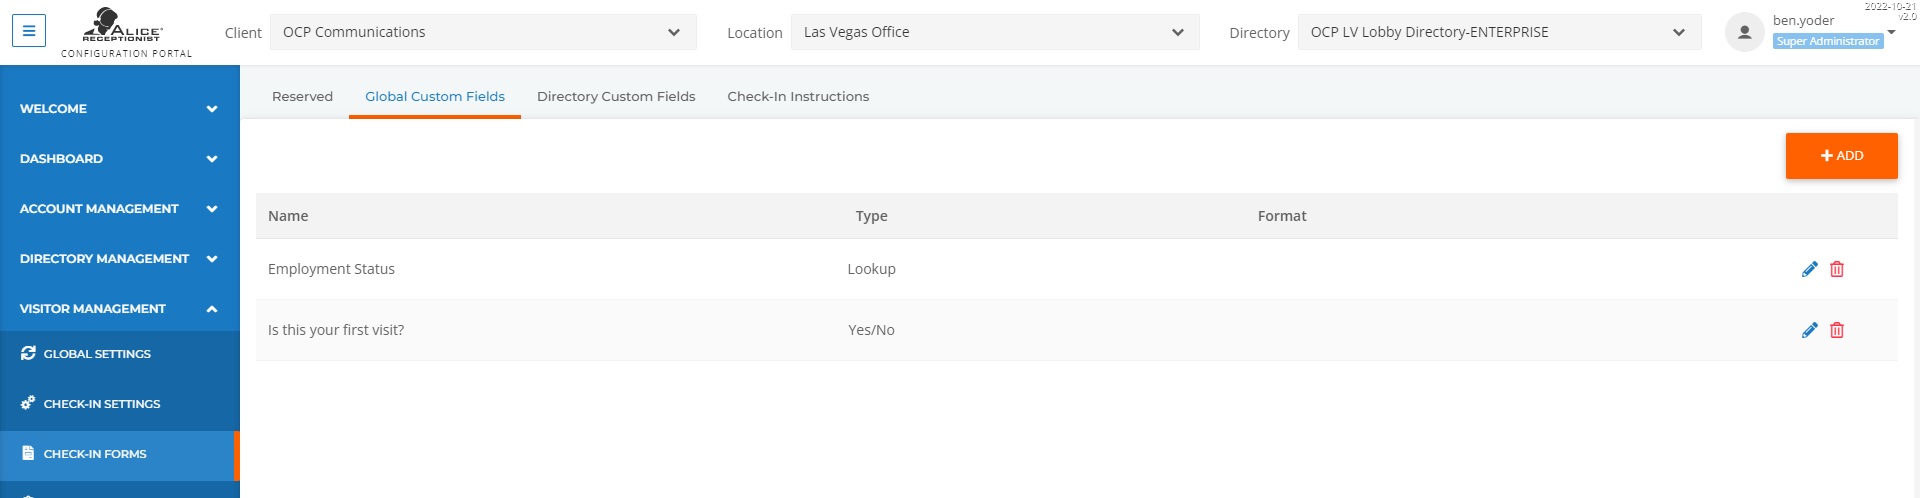
Before assigning custom fields for an individual or multiple ARDs![]() The ALICE interface that appears on the ALICE Kiosk in your Lobby, also known as the ALICE Receptionist Directory, a custom field must be created in this Global Custom Field section. The field can then be activated across one or more ARDs across the Organization in the Directory Custom Fields section.
The ALICE interface that appears on the ALICE Kiosk in your Lobby, also known as the ALICE Receptionist Directory, a custom field must be created in this Global Custom Field section. The field can then be activated across one or more ARDs across the Organization in the Directory Custom Fields section.
Related Videos
Creating a New Global Custom Field
To add a new Custom Field, select the orange Add button in the top right corner of the Global Custom Field page.
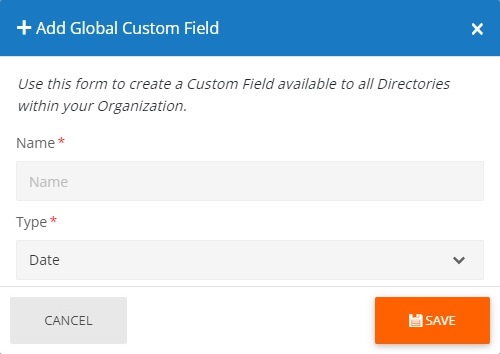
Name – The text that appears above the field that informs the visitor of what they need to fill in.
Example: "Is this your first visit?"
-
Type – The selected drop-down option determines this field's format, affecting what information the visitor can put in.
-
Date – The field will only accept a valid date.
-
When selected, a Format field will appear to define the date's format.
-
-
Email – The field will only accept a valid email address.
-
Look-up – Provides a user with a list of items to select from.
-
Use the + option to add new items.
-
-
Numeric – Limited the field to only numbers.
-
Phone – The field will only accept a valid phone number.
-
Text – The field will only accept alphanumeric characters.
-
Vaccine ID – The field will only accept a valid Vaccine ID number.
-
Yes / No – The field will let the visitor select a "Yes" or "No" response.
-
-
Use the orange Save button to save the settings.
Directory Custom Fields
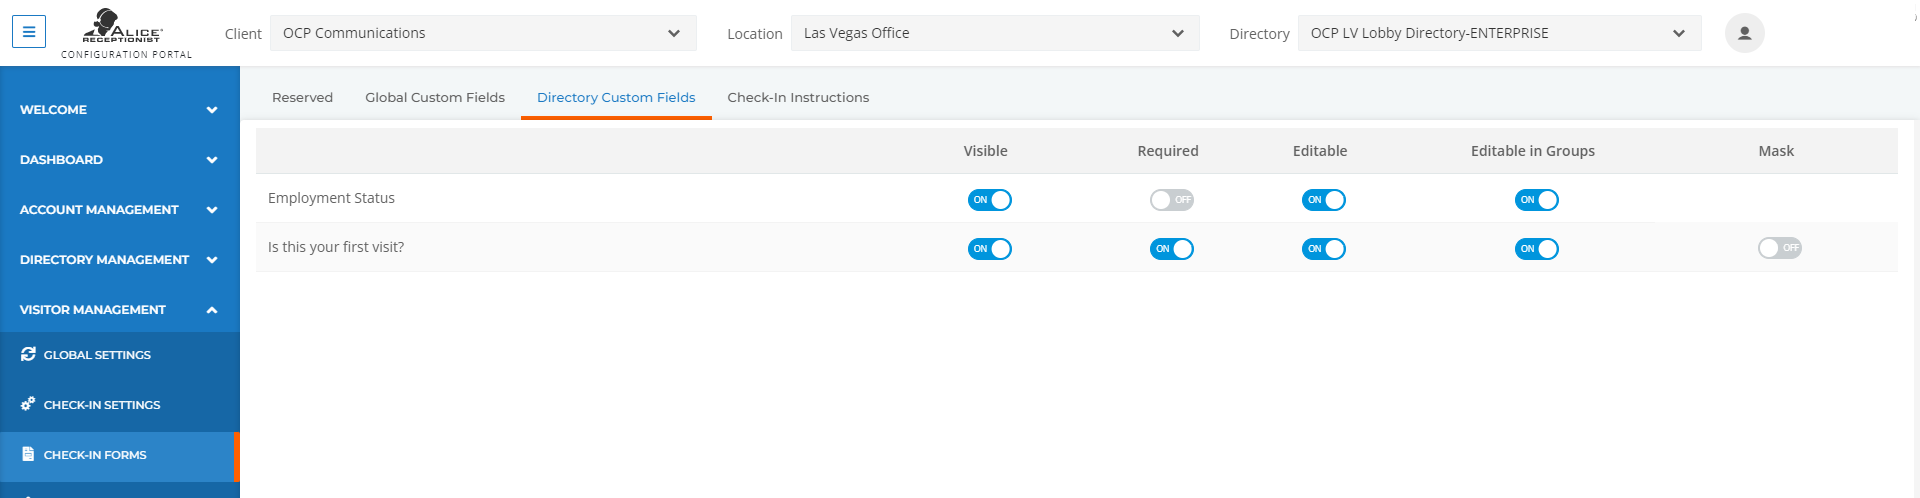
The Directory Custom Fields section determines which Custom Fields are enabled on each ARD![]() The ALICE interface that appears on the ALICE Kiosk in your Lobby, also known as the ALICE Receptionist Directory. Before changing settings, verify the correct ARD is being modified. Refer to the Navigating the ALICE Portal section for more details.
The ALICE interface that appears on the ALICE Kiosk in your Lobby, also known as the ALICE Receptionist Directory. Before changing settings, verify the correct ARD is being modified. Refer to the Navigating the ALICE Portal section for more details.
All Custom Fields must be created in the ALICE Portal Global Custom Fields Tab first. Once created, the listing will appear in the Directory Custom Fields section.
Field properties
The properties of each field can be adjusted using the following toggles:
-
Visible – When set to "ON," the field will display on the system.
-
Required – When set to "ON," the user must fill out this field before completing the check-in.
-
Editable – When set to "ON," the visitor can edit this field even if it was automatically populated by a preregistered visit or from an ID Scanner.
-
Editable in Groups – When set to "ON," the visitor can edit this field during a group check-in even if it was automatically populated by a preregistered visit or from an ID Scanner.
-
Mask – When set to "ON," the visitor's entry will be hidden as they populate the field.
Disabling a Custom Field From an ARD
The Directory Custom Field tab can remove a Custom Field from an ARD. Verify the correct directory is selected. Refer to the Navigating the ALICE Portal section for more details. Toggle the "Visible" setting to "OFF."
Deleting a Custom Field
Deleting a Custom Field will completely remove the listing from the ALICE Database. Navigate to the Global Custom Field tab. Click the  icon on the far-right column of the row. A pop-up window will ask for confirmation on deleting the listing from the database.
Note: This action cannot be undone. The listing will be removed from the portal. The related records will be retained.